Brake Bracket:
|
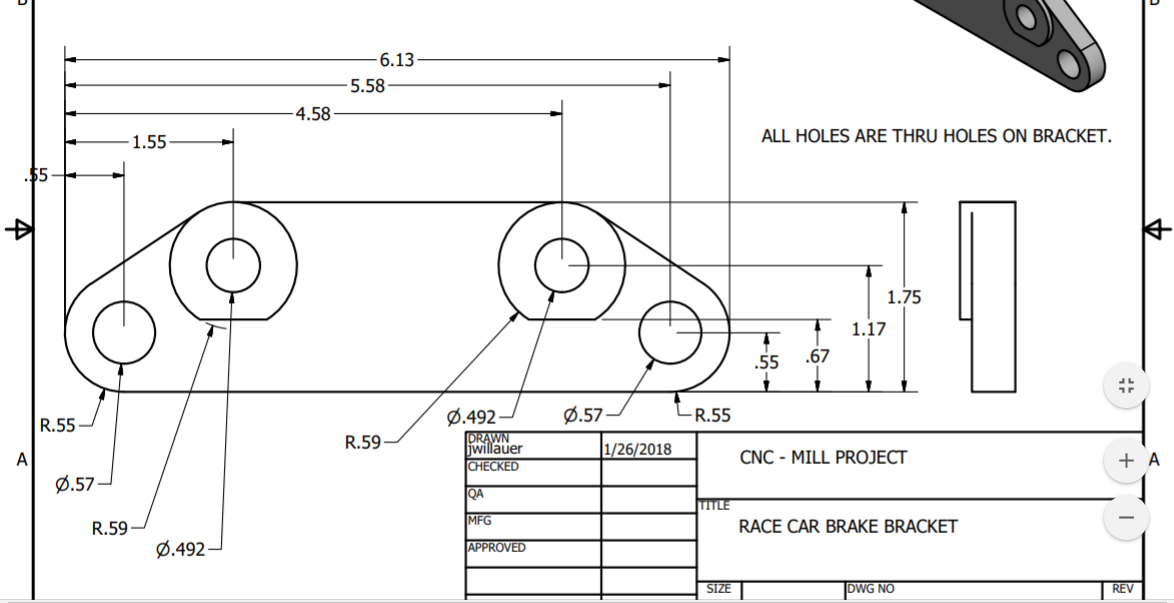
Our assignment for the CNC Mill was to make a brake bracket from a sketch that was given to use, using Inventor. First, I created a 2d sketch of the image using the dimensions that she gave us. The photo to the right is what we used to create the brake bracket.
|
|
|
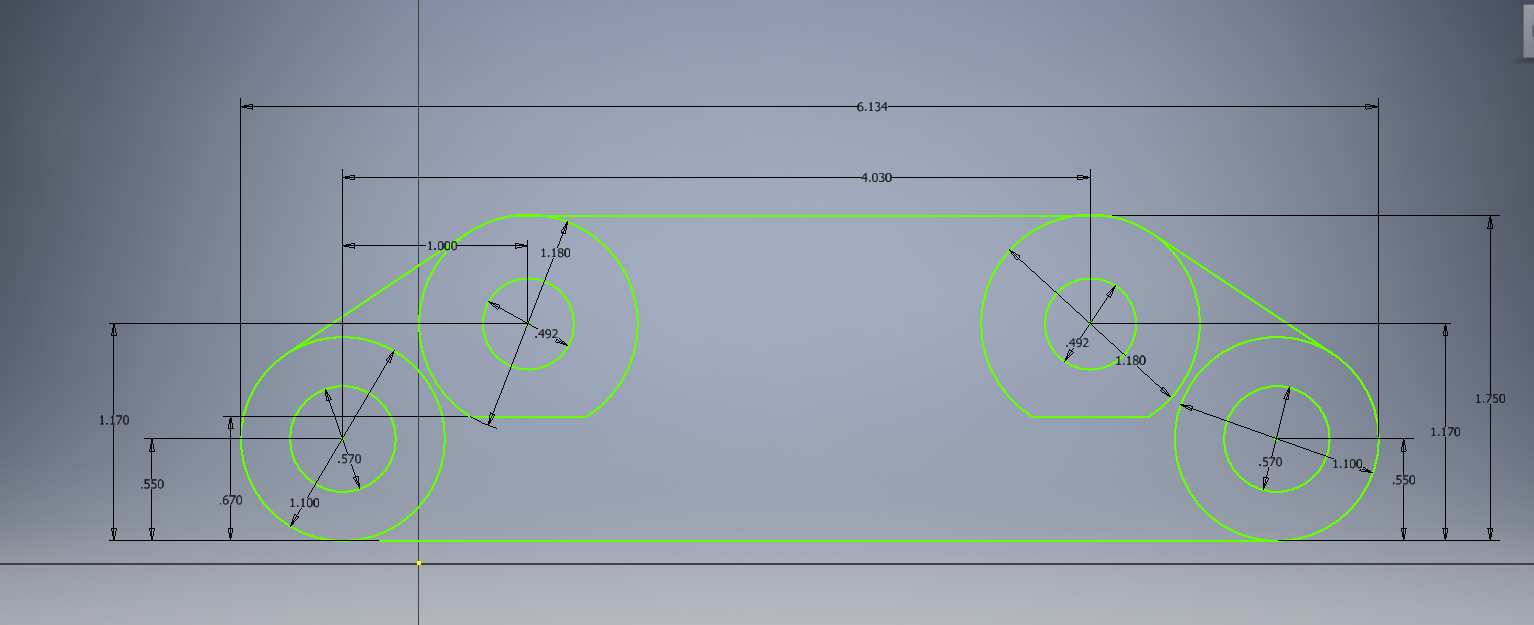
Next, I added all the dimensions that were on the reference sketch, including distance from the circles to the side, and diameter. To get the overall shape of the brake bracket, I made 2 large circles at the lower corners, and lined them up with the outside. Then taking the Tangent tool and the Trim tool, I removed the outside of the rectangle, leaving me with the correct shape. This photo is after I finished my sketch.
|
|
|
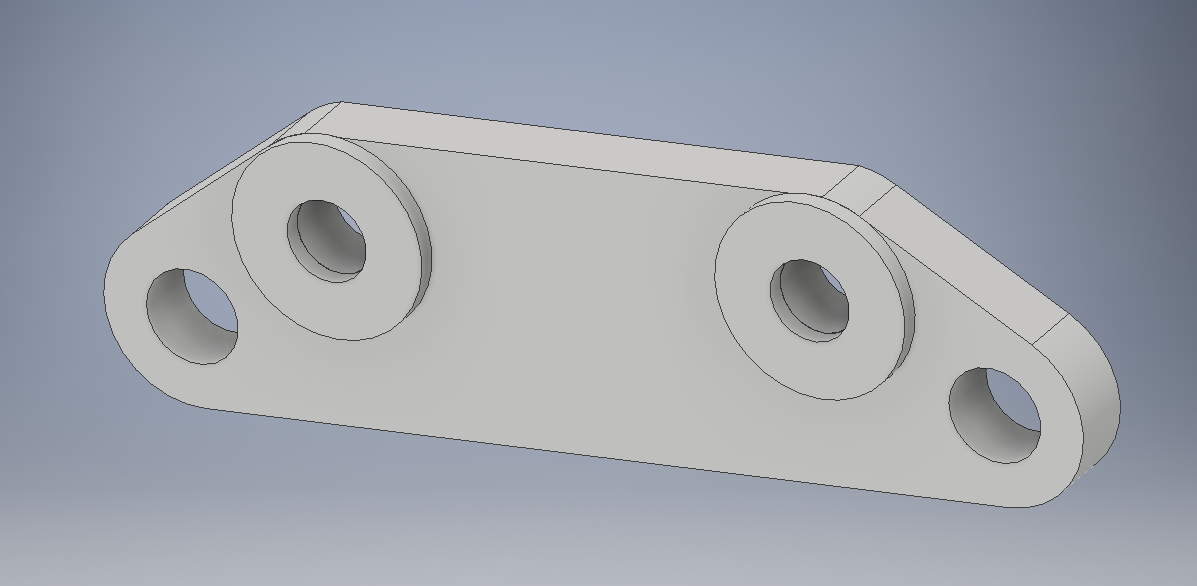
Then all I had to do was extrude it. There were 2 layers, so first I extruded everything out 0.4 inches, except for the 4 holes. Then I made another 2d sketch on top of the object, of the 2 bigger circles that I needed to have stick out a little bit more. I finished my sketch and extruded those out 0.1 inches. The picture on the right is the finished brake bracket.
|
|
What I learned:
This was a more advanced design than I have ever worked with in Inventor, so it was harder for me to get started and even know where to start. I learned that I need to ask questions, because I am not going to figure it out on my own, and I need to look at every little detail before I hit finish sketch and start extruding. This project was a lot of trial and error.
